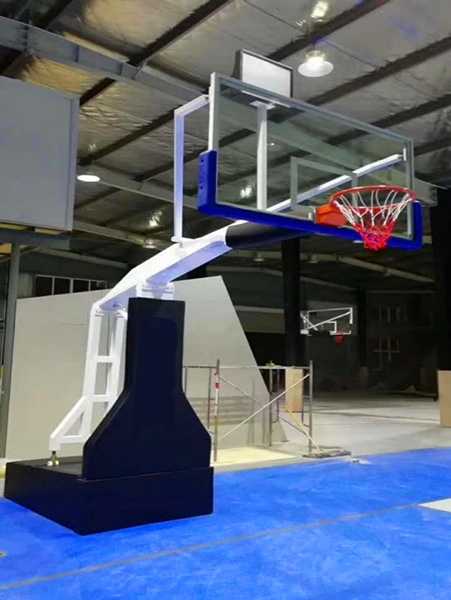
What tools are needed to install a hydraulic basketball stand?
Installing a hydraulic basketball hoop requires a range of specialized tools and auxiliary equipment to ensure a smooth and safe installation. The following is a list of tools and detailed instructions for installing a hydraulic basketball hoop:

1. Basic Installation Tools
Power Tools
Impact Drill/Electric Drill: Used for drilling holes in the ground or wall to install expansion bolts or brackets. Drill bits of varying diameters (e.g., 12mm, 16mm) are required to accommodate different bolt sizes.
Angle Grinder: Used for cutting steel or grinding welds to ensure smooth joints. Bracket length adjustments and removal of excess material may be necessary during installation.
Welder (Optional): If the basketball hoop bracket requires on-site welding (e.g., non-prefabricated components), a welder is required for securing the bracket. However, most prefabricated hydraulic basketball hoops are pre-welded, making this tool unnecessary.
Hand Tools
Adjustable Wrench/Socket Wrench: Used for tightening bolts and nuts and adjusting bracket angles. A variety of sizes (e.g., 10-32mm) are required to accommodate different connector sizes. Screwdriver (Phillips/Slotted): Used to install screws for small components such as the backboard and basket.
Level: Ensure the basketball stand is installed vertically to avoid tilting and potential safety hazards.
Tape Measure/Ruler: Measure installation location, hole spacing, and other dimensions to ensure accuracy.
Marker: Mark drill hole locations on the floor or wall to improve installation efficiency.
II. Hydraulic System Debugging Tools
Hydraulic Oil Filling Equipment
Handheld/Electric Oil Pump: Used to fill the hydraulic system with hydraulic oil to ensure a clear flow of oil. Select the appropriate pump size based on the basketball stand model.
Oil Can/Funnel: Assists in filling the hydraulic oil to prevent spills.
Hydraulic Oil: Use hydraulic oil compatible with the basketball stand (e.g., No. 46 anti-wear hydraulic oil) to ensure proper system operation.
Pressure Testing Tools
Pressure Gauge: Connects to the hydraulic system to check whether the oil pressure is within the normal range (usually 10-20 MPa) to prevent malfunctions caused by excessively high or low pressure.
Pressure Relief Valve: Used to relieve system pressure during debugging to ensure safe operation. 3. Safety Tools
Personal Protective Equipment
Hardware: Prevent head injuries during installation.
Protective gloves: Protect hands from scratches on steel or corrosion from hydraulic fluid.
Safety shoes: Anti-slip and impact-resistant, protecting feet.
Auxiliary Safety Equipment
Safety rope/safety belt: If overhead work is required (such as installing a backboard), use a safety rope to secure your body and prevent falls.
Warning signs: Post "Construction in Progress" signs in the installation area to alert others to stay away.
4. Other Auxiliary Tools
Carrying Tools
Hand hydraulic forklift/crane: Used to carry heavy components such as the basketball hoop body and base, reducing labor burden.
Ropes/straps: Secure components to prevent slipping during handling.
Cleaning Tools
Rubber/cleaner: Clean the basketball hoop surface after installation to remove oil stains, fingerprints, and other traces.
Vacuum cleaner: Remove debris and dust from the installation site.
Supplier Materials
Expansion bolts/chemical anchors: Used to secure the brackets. Prepare various sizes (such as M12 and M16) to accommodate different floor materials. Sealant/Anti-Rust Paint: Seal and rust-proof drilled holes or welds to extend the lifespan.
V. Installation Steps and Tool Usage Examples
Positioning and Drilling
Use a tape measure and a marker to mark the bracket installation location on the ground.
Use an impact drill to drill holes to a depth greater than the length of the expansion bolts.
Insert the expansion bolts and tighten with an adjustable wrench.
Assembling the Bracket
Connect the hydraulic rod to the base and tighten the set screws with a socket wrench.
Use a level to adjust the bracket verticality to ensure the basketball stand does not tilt after installation.
Installing the Backboard and Hoop
Use a screwdriver to secure the backboard to the bracket, ensuring that the holes are aligned.
Installing the hoop and adjusting the height to the standard value (e.g., 3.05 meters) are used. Use a level to verify.
Hydraulic System Debugging
Connect the oil pump to the hydraulic system and fill with hydraulic oil to the specified mark.
Use a pressure gauge to check the oil pressure and adjust the pressure relief valve to the normal range.
Raise and lower the hydraulic rod to check for smooth movement and no sticking.
Safety Check
Check that all bolts are tightened and not loose. Test the basketball hoop's stability by gently pushing it to see if it wobbles.
Clean up the scene and remove the warning sign.
padel court,Gymnastic mats, basketball racks, volleyball posts, tennis dwellings, badminton posts, adult gymnastic equipment, parallel bars, horizontal bars, uneven bars, gymnastic rings, balance beams, saddles, hydraulic referee tables, table tennis tables, outdoor fitness equipment, garden fitness equipment
Website:
http://www.hransports.com/article/321.html